March 2, 2013
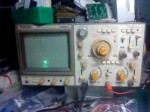
Frame signal from motherboard recorded by web7days at 0:14 second in PCI AD A34, see the short burst signal recorded on the oscilloscope. In BIOS, frame signal can be obtained in pin 31. The FRAME signal (the AGP frame period and the PCI frame period) these two are the CPU power supply, the clock, after the replacement normal, CPU starts to work, through CPU, northbridge, southbridge, interface circuits and so on PCI transports the data, the order is northbride CPU- south bridge – BIOS. The FRAME signal for the northern bridge an important signal which transmits toward the south bridge, if this no signal found, north bridge may have problems, we to consider power supply, clock, or other. If this signal found, in addition south bridge itself working condition satisfies, south bridge does not work, that is south bridge has a real problem
Tags: addition-south, bridge-itself, data, find-on-budget, frame-signal, gaming, gaming-computer, northern, quick-unboxing, replacement, south-bridge, the-motherboard
Posted in Motherboard Problem | No Comments »
January 4, 2013
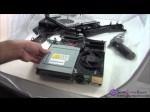
How to replace XBOX360 (SLIM) Lite-On DG-16D4S old/damaged/broken DVD drive with a new DVD Drive Brief Introduction:- The XBOX360 (PHAT & SLIM) DVD Drive is coupled with the XBOX360 motherboard meaning HOT SWAPPING a DVD Drive is not possible with the XBOX360 System. Every XBOX360 has a unique DVDKey which must be transferred across to the new drive. If you purchase a brand new XBOX360 (SLIM) Lite-On DVD Drive from our online store or any other store it would either be blank or have a DVDKey that does not match with your motherboard. Simply purchasing a brand new Lite-On DG-DG-16D4S DVD Drive and placing into your XBOX360 will NOT work. There are two methods to carry out DVD Drive Replacement on XBOX360 (SLIM). Method 1 (PCB Replacement) Method 2 ( DVDKey Extraction from Old Drive and flashing onto new Drive) In this video we will be showing complete (in FULL HD) Method 1 (PCB Replacement) Description: Tutorial contains full information how to carry out XBOX360 (SLIM) Lite-On DG-16D4S DVD Drive replacement. If your Lite-On DG-16D4S DVD Drive has any of the following issues you may need to replace your DVD Drive – Open Tray Error Message – Drive unable to read discs – Drive unable to eject – Drive is completely unresponsive – Drive does not spin – Drive springs are damaged – Drive rail assembly is damaged – Drive motor assembly is damaged – Drive is bricked – Game freeze during game play – Console is frozen when a game is loaded Compatibility:- Following Lite-On DG-16D4S …
Tags: carry-out-dvd, cd problem, compatibility, drive, drive-brief, dvd, fix, how to fix, motherboard, motor-assembly, online, replacement, self fix, system-every, tutorial
Posted in CD/DVD Drive Problem | No Comments »
September 29, 2012
Video by PCNix Computer Repair covering Toronto, Scarborough and GTA. www.pcnix.ca Call us at 416-223-2525. Sony Vaio PCG-8111L DC Jack Replacement procedure. Laptop Computer Repair job at PCNix. Warning: This is a complicated computer, perform at your own risk.
Tags: computer repair, gta, howto & style, laptop repair, laptop-computer, pcg, replacement, scarborough, toronto, your-own
Posted in Laptop Repair | No Comments »
September 13, 2012

Video by PCNix Computer Repair covering Toronto, Scarborough and GTA. Call us at 416-223-2525 or see www.pcnix.ca
Tags: 2525-or-see, computer help, computer repair, fix computer, gta, howto & style, laptop repair, laptop-computer, pcg, replacement, toronto, your-own
Posted in Laptop Repair | No Comments »
June 23, 2012
Laptop repair specialists Ltd repair any Laptop VGA Card Replacement on the same day, please visit our website for more information at www.laptoprepairspecia…
Tags: computer help, diy, fix computer, laptop, laptop repair, nformation-at-www, our-website, please-visit, replacement, the-same, vga
Posted in Laptop Repair | No Comments »
February 22, 2012
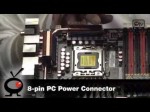
Take advantage of the most significant architectural change in the x86 architecture in 13 years, the Intel Core i7. The ASUS P6T Deluxe introduces a new era for extreme performance. It is an X58-based motherboard that supports Intels new generation extreme performance Core i7 Processors and both SLI and CrossFireX! Six SATA ports with RAID 0, 1, 5, and 10 as well as two SAS, or Serial Attached SCSI, ports supporting RAID 0 and 1 give you plenty of storage options and the ability to use hard drives with speeds of up to 15000 RPMs. Memory support includes up to 24GB of Triple Channel DDR3 memory. Intel has brought back Hyperthreading technology and combined it with a native quad-core design to give support for 8 seperate threads in the new LGA1366 / Socket B CPU interface and their replacement for the old Front Side Bus technology, QuickPath Interconnect provides a system bus speed of up to 6.4GT/s. The three PCI-Express 2.0 slots can operate at either x16/x16/x1 or x16/x8/x8 to take full advantage of either 2 or 3 graphics cards.
Tags: 1366, asus, how to fix, hyperthreading, intel, motherboard, p6t-deluxe, processors, replacement, science & technology, triple-channel, well-as-two
Posted in Motherboard Problem | No Comments »
February 13, 2012
Skip Intro 0:54 Digitizer Replacement 3:49 LCD Replacement 7:52 or 10:30 Charger/Headphone Socket, Speaker & LED Flash 8:55 Assembly 12:33 To replace a damaged LCD (AMOLED) or Touch screen (Digitizer) you’ll need: A T6 Torx star type screwdriver. (search for torx on Maplin or Amazon) A small bladed screwdriver, plastic knife and maybe some tweezers to grab the screws. If you need to replace the touch screen (digitizer) I recommend you get one that comes already in a frame. If you get one without the frame, you’ll need to carefully remove the damaged screen and then glue the new one back in. I found the middle ‘MENU’ button didn’t work after doing this. If pressing the ‘menu’ key brings up the ‘Unlock’ icon while the screen lock is active you know the buttons working OK. After connecting to Ovi Suite it was working fine again. If you still have trouble, try updating or re-installing the firmware using Ovi Suite. The same thing happens after repairing the Nokia N8 europe.nokia.com For solutions to most technical problems try discussions.europe.nokia.com Parts are very easy to find online. Doing this will void any warranty. Please rate&sub and I’ll do my best to put some more on here… Filmed with a Panasonic HDC-SD700 camcorder @ 1080i/25fps
Tags: deshacer, dismantle, dismental, fix, grab-the-screws, instructions, pressure, réparation, replacement, retirer, tutorial
Posted in Monitor Problem | No Comments »
December 22, 2011

The original MacBook Air is an amazing piece of tech but it is not without fault. The thing we hear complained about the most around here is that the hinges break easily, and unfortunately, the hinge is integrated into the display assembly. Whether you have broken hinges or need to replace your LCD replacing your display assembly is a big project but not especially difficult. This video will show you how to replace the display assembly on your original Macbook AIr. You can find the replacement display assemblies on our site here www.ifixit.com All the tools you will need can be found here www.ifixit.com You may find the exploded iPhone 4 tee shirt here: www.ifixit.com
Tags: air, display, do it yourself, htc, i fix it, jenna, replacement, science & technology, tuts, www.ifixit.com
Posted in Monitor Problem | No Comments »
December 8, 2011
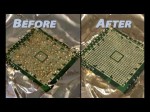
Reballing the Nvidia Graphic Chip on Dell m1330 and HP DV2000 DV9000 bywww.e14tech.com/gpu-reballing overheating laptop Black screen problem repair, blank display, no video, no bios, laptop doesn’t turn on, one long beep followed by two short beeps, lines across screen, white screen, red screen, blue screen error freezes during video playback, random characters appearing,
Tags: beep-followed, black, chip-on-dell, during-video, fix, laptop-doesn, nvidia, red screen, replacement, science & technology, screen-problem, white screen
Posted in Monitor Problem | No Comments »
December 7, 2011
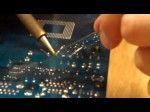
A bit of a project “teaser” I could do a little more in-depth version if there is enough interest – Created on March 27, 2011 using FlipShare. “Bad Caps” can cause all sorts of quirky electronics problems. Sometimes these are the Gremlin or “Ghost in the machine” that cause funky problems. You can sometimes hear them “whistling” high pitched screams. Kind of like an electronic banshee signaling the demiss of your favorite piece of electronics. Grab a flash light and unplug whatever device your checking and do a physical inspection. If you see these caps looking like “jiffy pop” popcorn or leaking like an old battery your have a candidate for cap replacement. A bad formula for the capacitors was stolen (corporate espionage” is the main reason for the problem. From WiKi: The capacitor plague (also known as bad capacitors) is an ongoing problem with premature failure of large numbers of electrolytic capacitors of certain brands. Capacitors are used in various electronics equipment, particularly motherboards, video cards, compact fluorescent lamp ballasts, LCD monitors, and power supplies of personal computers. The first flawed capacitors were seen in 1999, but most of the affected capacitors were made in the early to mid 2000s.
Tags: bad-capacitors, cleaning, enough-interest, high pitched, installation, laptop, motherboard, ongoing-problem, plague, quality, repair, replacement, zap
Posted in Motherboard Problem | No Comments »


