
This video shows how it is easy to replace a shared, network folder with Alfresco. Giving users easy access to content management features.

This video shows how it is easy to replace a shared, network folder with Alfresco. Giving users easy access to content management features.
![How to Install+Patch(1.0.4.0)+Crack GTA 4 PC (REMAKE) [HD]](http://computerrepairspot.com/wp-content/uploads/2011/07/8e7be3d55b0.jpg-150x112.jpg)
How to Install+Patch (1.0.4.0)+Crack on GTA 4 PC (Remake) note : description is the same as the original one, difference only in video. This is a remake video, for all you guys to watch it clearer in HD, and shorten to saves more time. my Channel : www.YouTube.com/ChanAldrick Pay Attention to this Tutorial Video If you don’t understand this video : Installation : 1. insert your GTA 4 CD 2. Open GTA 4 installer (or double click it on your DVD drive). 3. click accept 4. choose where you want to install your GTA 4. (mine is drive D:, i just renamed it to I:) 5. just click next and i accept the licence agreement.. etc. until you see GTA 4 is installing (note : i skipped the installation progress of GTA 4 to shorten the video length. 6. after you installed GTA 4. go to your DVD drive again, right click then click open. 7. There you will find a folder name called ” RGSC” meaning Rockstar Games Social Club. 8. Open that folder, then open setup, then install it. 9. ok, now GTA 4 and RGSC are already installed, it’s time for the patch and the crack. 10. go to this site to download the patch and the crack here : www.4shared.com . (you need winrar to open/extract them) Winrar download : www.rarlabs.com 11. open (G_4_1.0.4.0_2) the file you’ve just downloaded. install GTA IV maintenance (patch 1.0.4.0) 12. after you installed the GTA IV maintenance (patch 1.0.4.0). open the folder called Razor 1911, you can see the two files. drag the two files to the main folder of the GTA 4 (ex. C …
How to Install+Patch (1.0.4.0)+Crack on GTA 4 PC Pay Attention to this Tutorial Video If you don’t understand this video : Installation : 1. insert your GTA 4 CD 2. Open GTA 4 installer (or double click it on your DVD drive). 3. click accept 4. choose where you want to install your GTA 4. (mine is drive D:, i just renamed it to I:) 5. just click next and i accept the licence agreement.. etc. until you see GTA 4 is installing (note : i skipped the installation progress of GTA 4 to shorten the video length. 6. after you installed GTA 4. go to your DVD drive again, right click then click open. 7. There you will find a folder name called ” RGSC” meaning Rockstar Games Social Club. 8. Open that folder, then open setup, then install it. 9. ok, now GTA 4 and RGSC are already installed, it’s time for the patch and the crack. 10. go to this site to download the patch and the crack here : www.megaupload.com . (you need winrar to open them) Winrar download : www.rarlabs.com 11. open (G_4_1.0.4.0_2) the file you’ve just downloaded. install GTA IV maintenance (patch 1.0.4.0) 12. after you installed the GTA IV maintenance (patch 1.0.4.0). open the folder called Razor 1911, you can see the two files. drag the two files to the main folder of the GTA 4 (ex. C:/Program files/Rockstar Games/Grand Theft Auto IV). you can extract the two files to your desktop and right click them then copy and paste them to the main root of your GTA 4 folder. and REPLACE them. 13. now open Rockstar Games …

FSX – Lukla Problem Please Comment, I need help My Computer Specs: Intel® CoreTM i5 760 (2.8GHz/8MB cache) 8GB3 Dual Channel DDR3 SDRAM at 1333MHz 1024 (MB) ATI HD5450 RadeonTM 1000GB4 SATA hard drive (RPM) (7200RPM) Blu-Ray ROM Drive (read/write CD/DVD & read Blu-Ray Disc)
![Build your very own Computer! (Part 1 of 2) [HD]](http://computerrepairspot.com/wp-content/uploads/2011/07/b5b226f4c70.jpg-150x112.jpg)
Part 1 of 2 of how to put together a powerful PC for less money than buying one! This video assumes that you have already purchased your components and want to find out how to put it all together. (See external link for buying tips until I make that video) Find out tips and tricks to neatly organise a reliable, fast and cheap system for any calibre: from a budget computer to a massive gaming rig. This video shows you generic methods to get your system up and running, ready for Windows. External Links: Choosing your components: www.howtogeek.com – DISCLAIMER – I do not claim responsibility for any damage or data loss to your computer. However, unlikely this may be, if you do experience problems, contact me direct on my channel, or at CJ.FixThePC@gmail.com, and your problem may be viewed on a Q&A video. The vast majority of my educational videos are not the only way to approach the task, but they are in my views the best way of going about it. Comment to your hearts content! If you like my videos and wish to know more, hit the subscribe button at the top.
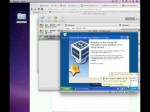
View full tutorial and more resources at zechdc.com Objective: Get IE 6, 7 and 8 working on a Mac. Solution VirtualBox w/ 3 MS vhd’s – We will cover this solution in this tutorial. Things you’ll need: You will need the following files to complete this tutorial. All of them are FREE! I will show you how to download them in the screencast, I just included the links for your convenience. VirtualBox – www.virtualbox.org Zipeg – www.zipeg.com WinXP vhd’s – www.microsoft.com pcntpci5.sys – dllexedown.com People said they had problems with the above link so here is a link to a zipped version – dl.dropbox.com Get Audio Working! Read the update below. ac97intc.sys – dl.dropbox.com ————— UPDATE —————- 6/30/2011 How to get Audio Working! 1) Download the ac97intc.sys system file directly using IE while inside the Virtual Box. Link Above ^ 2) Add the hardware plus audio system file (ac97intc.sys) the way we added the network adapter in the video. Thanks @missmdio for figuring it out.

The desktop computer at home suddenly started doing this recently. Starts as soon as it is turned on until i give up and turn it off again, its not a problem with the monitor as i plugged it into my laptop and used as an extension to check it still worked. I was thinking it was perhaps a problem to do with the video/graphics card as ive seen similar things happen due to that component although much easier to remedy. as far as i can tell the rest of the compter is functioning as normal. (i can tell as upon booting up it asks me to press f1 which i do when it beeps three times) please can you leave me some advice and hoopla for me so i can get it sorted

fix software problems computer Download Registry cleaner Pro for free ad Clean your Registry automatically. Download for free at Link in Video little registry cleaner cnet tweaknow reg cleaner pro clean windows xp registry ms dos registry free cleaner windows cc registry cleaner freeware…
I have a Warcraft III Hosting Site. Here it is: war3hosting.webs.com (NOTE: Windows XP Demonstration. I do not give Mac support, sorry.) IF THE VIDEO DOES NOT PLAY: TYPE “&fmt=18” at the end of the URL.I’ll make some comments to the video. Just click View All Comments to see a text description on how to do this. Link to Portforwarding site: portforward.com I’d also like to share some info on what kind of things can block you from hosting. Router (port forwarding) Modem Firewall (like Windows Firewall) Software (can block other software/ports) For Vista users:(I haven’t found any problems as for the default settings for Vista. If settings have been manually changed then the software may need to be checked.) Windows Firewall is a bit different on Vista so you need to do something else. First you need to login to Administration Tools with Windows Firewall. Once there you need to configurate inbound/outbound rules for ICMPv6 for routers. Another thing I found that might help: In the Advanced tab of your windows firewall un-check your connection from the box. This will let the firewall know you don’t want it to protect your connection. This way you can receive incoming connections. Username/Password If you don’t know it and the person who set-up the router doesn’t know it.. Try looking default username/password for your specific router or you could just reset the router back to default if it is not already at default. There should be a little pen-size hole somewhere that will …

this will teach you how to get back into your computer after you have forgotten your password. you dont need any discs or software or tricks. this is simple i have had no problems doing this so far but do not take responsibility to any damage you do. All your music pictures and other data will be lost! please rate and push subscribe button above video (does not cost you anything)! :] In the video i said i would put the codes in the description. 1. type /sbin/mount -uw / hit enter key 2. type RM /var/db/.Applesetupdone hit enter key 3.type reboot hit enter key Oh and another thing if you use the same name that you did when you first got the computer and set it up it will overwrite the previous account